Many people are proponents of buying low cost but with an upgrade path. Maybe you spend $60 on a cheap dual core CPU and a $150 on graphics and another $100 on a motherboard. Add in some RAM, PSU, hard drive, and a case and you're going to be able to build a decent gaming PC for about $500. The idea is to have a gaming PC that's competent enough now and that you can put better parts into later. Next summer you get a better CPU. After that you upgrade the graphics. Later still you buy an SSD or more RAM. I typically find people express this as the best approach because it allows you have a system that grows with your needs. At the start, it's about a costly and efficient as an X-box or PlayStation but can be improved later in ways they can't.
I reject that approach entirely. When I built my first gaming PC in 2005, right at the end of my freshman year of college, I was totally in the "build now upgrade later" camp. And guess what, by the time 2009 came around, I hadn't upgraded my PC at all. Maybe it was laziness on my part but the changing technology also played a role. When I started looking into improving my machine, I realized that the newest CPUs and GPUs wouldn't even fit because the physical slots and connectors had changed and improved. The best CPU I could buy was the top of the line CPU from 2004, not the top of the line CPU from 2008. The same goes with almost every other part of that machine.
When I built my PC in 2009, I decided to spend lots of money up front so that the hardware I used would remain current for as long as possible. That meant shelling out hundreds for the first Intel true quad core chip, the i7-920. Also, that chip was an epic overclocker. It ran at a stock 2.66ghz but I used it at 3.8ghz the entirety of the time I owned it. It meant buying a motherboard which used the brand new DDR3 memory which both had a big price premium attached because they were new. I bought top of the line graphics and an interface (PCI-express 2.0) which was set to remain the standard for several years. The results were stunning at the time and rarely required an upgrade. I changed 3 things with this computer. 1. I upgraded my graphics card to play Skyrim. 2. I bought an SSD. 3. I bought more RAM.
So, strangely, the computer that I didn't plan on upgrading got more upgrades. It had the benefit of being fast at the start, powerful enough to handle new games as the came out years later, and advanced enough that new technologies wouldn't pass it by too quickly. For example, I could very easily have purchased a new GPU to replace the broken one and kept playing brand new games at high settings on my Hi-Def monitor for, I don't know, 2 more years probably. So, yeah, that's my philosophy of gaming PC building: Go big or go buy a console.
Which brings us to today's build. I've basically replicated by 2009 build using today's newest top of the line components. I'll put a list a little bit later but I want to give you a summary. First off the CPU/Motherboard/RAM are all part of Intel's new X-99 chipset. Basically, they're the features and parts that mainstream computers will see introduced in the next 2 years: DDR4 RAM, high efficiency 6-8 core CPUs, and faster onboard interfaces like PCI-express 3.0, USB 3.0, Sata 3, M.2 Storage, and numerous other things. I picked the GPU with a lot of trepidation. Right now, I wanted a GPU which did 2 things: 1. vent hot exhaust from the rear of the case. 2. Could play any game currently out at 1080p with max settings and achieve more than 60fps. I my mind that makes the card a little future proof so I won't have to upgrade for a while. With 4k displays growing in popularity and dropping in price, I needed a card to last me until I make the switch to a 4k display. I wanted a case with good airflow and low noise. I opted, controversially, for a case without space for a DVD/CD drive because Steam, Netflix, YouTube, etc. Also, I bought the fastest SSD. The end. It's actually faster than the Sata 3 interface I just told you was top of the line.
Here's the list for any who are interested:
[PCPartPicker part list](http://pcpartpicker.com/p/T9KsWZ)
**CPU** | [\*Intel Core i7-5820K 3.3GHz 6-Core Processor]
(http://pcpartpicker.com/part/intel-cpu-bx80648i75820k)
**CPU Cooler** | [\*Corsair H100i 77.0 CFM Liquid CPU Cooler](http://pcpartpicker.com/part/corsair-cpu-cooler-h100i)
**Motherboard** | [\*Asus X99-A ATX LGA2011-3 Motherboard](http://pcpartpicker.com/part/asus-motherboard-x99a)
**Memory** | [\*Corsair Vengeance LPX 16GB (4 x 4GB) DDR4-2800 Memory](http://pcpartpicker.com/part/corsair-memory-cmk16gx4m4a2800c16)
**Memory** | [\*Corsair Vengeance LPX 16GB (4 x 4GB) DDR4-2800 Memory](http://pcpartpicker.com/part/corsair-memory-cmk16gx4m4a2800c16)
**Storage** | [\*Samsung 850 Pro Series 512GB 2.5" Solid State Drive](http://pcpartpicker.com/part/samsung-internal-hard-drive-mz7ke512bw)
**Video Card** | [PNY GeForce GTX 970 4GB XLR8 Video Card](http://pcpartpicker.com/part/pny-video-card-vcggtx9704xpb)
**Case** | [\*NZXT H440 (White/Black) ATX Mid Tower Case]
(http://pcpartpicker.com/part/nzxt-case-cah440ww1)
**Power Supply** | [\*Corsair 760W 80+ Platinum Certified Fully-Modular ATX Power Supply](http://pcpartpicker.com/part/corsair-power-supply-ax760i)
Rather than bore you any more than I already have with all the build details, I'll put some pictures up of the build.
 |
| Here's the new motherboard. You'll notice I am trying to follow a black and white theme. |
 |
| For comparison, here's my old motherboard. |
 |
| The new CPU. |
 |
| My new RAM with some of the fans I'm using in my build. |
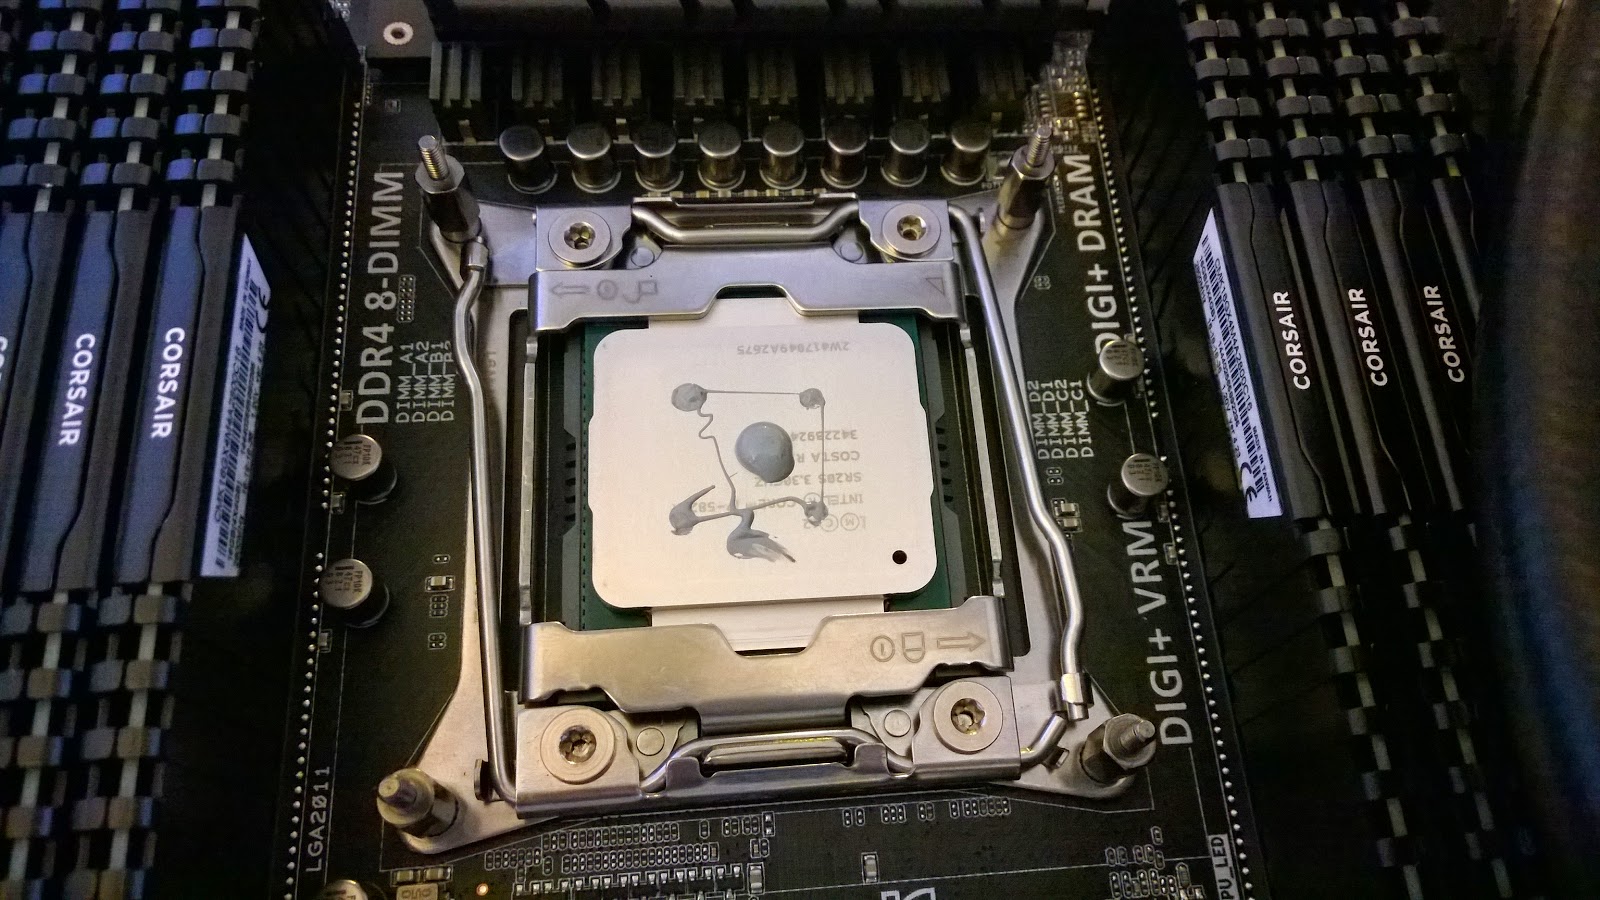 |
| Here's the CPU in socket with cooling compound in place. You can also see I've put the RAM in. |
 |
| This is looking through the case toward the front. I've put the radiator right up front to give it the most cool air. |
 |
| This is a view of the front with the cover off. The red fans are special high static pressure fans designed for use with a radiator. There's also a dust filter which covers the front fans so the case stays nice and clean inside. |
 |
| An outside view of the case with all the covers off. There are three fans up top for exhaust and another in the back. I shouldn't have to worry about airflow. |
 |
| The GPU prior to installation. |
 |
| Everything's wired up and running. I didn't have a very clean build last time so I prioritized getting as many wires out of the way as possible. Hopefully this will translate into better airflow to the motherboard and GPU. The black and white theme looks pretty good. |
 |
| Here's the completed product under my desk with the requisite rat's nest of cable and wires. Luckily, the insides are nice and clean. |
That's pretty much it. The PSU and hard drive are in the large space hidden below the main compartment. I do plan on overclocking but I will use the computer at stock settings for a little while to be sure it is stable. I'll probably post a quick piece about the overclock sometime in Feb. when I attempt it. Overall, I've accomplished my goals and added a little bit of vanity to boot (it kinda reminds me of a storm trooper). Now that it's a fully functional gaming machine, I plan to write more about This War of Mine and probably some other games I'm playing.

No comments:
Post a Comment